
Theodore Lowe, Ap #867-859
Sit Rd, Azusa New York
Find us here
How to Change Hair Color in Photoshop: 7 Easy Steps
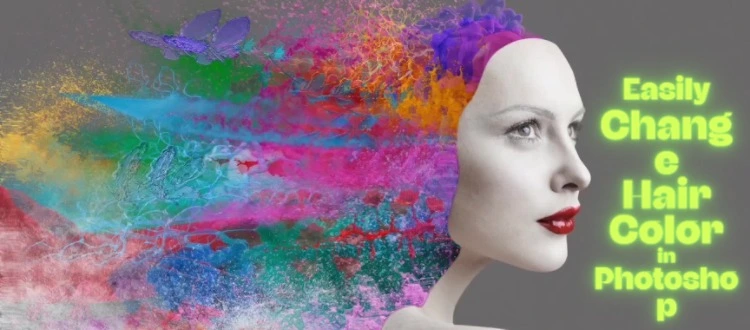
By learning how to change hair color in Photoshop, you can preview endless possibilities, whether you're curious about going blonde, brunette, or even something more adventurous like pastel pink. In this guide, you'll discover 7 easy steps to achieve a seamless transformation that looks natural and polished.
Imagine the fun and creativity you can unleash, crafting a new image of yourself that matches your mood or the season. Dive into the steps and unlock the secrets to transforming your hair color effortlessly. Ready to see the magic unfold? Let's get started!
Preparing Your Image
Changing hair color in Photoshop can transform your photos. Preparing your image is the first step. It ensures your results look realistic and vibrant. Follow these simple steps to get started.
Choosing The Right Photo
Begin by selecting a high-resolution photo. Good lighting enhances details. It makes editing easier. Choose a photo where hair is clearly visible. Avoid blurry images. They complicate the editing process.
Opening The Image In Photoshop
Start by launching Photoshop. Open your chosen photo. Use the File menu. Click 'Open' and select your image. This allows you to work on a large canvas. It provides space for detailed edits.
Once open, check the photo dimensions. Larger images offer better editing control. Zoom in to see hair details. This ensures accuracy when changing colors.
Selecting The Hair
Changing hair color in Photoshop requires precise selection. Selecting the hair accurately is crucial. An accurate selection ensures realistic results. It helps in maintaining the natural texture and flow. Let’s explore the key steps to select hair effectively.
Using The Quick Selection Tool
The Quick Selection Tool simplifies hair selection. Find it in the toolbar on the left. Click the tool icon to activate it. Adjust the brush size for better control. Larger brushes cover more area. Smaller brushes capture finer details. Carefully trace around the hair. Click and drag to select. Avoid selecting areas outside the hair.
Zoom in for better accuracy. Use the Zoom Tool or shortcut keys. This helps in precision. If the selection includes unwanted areas, undo. Press Alt (Option on Mac) to subtract. This refines the selection further. Practice makes selection easier.
Refining The Selection
After initial selection, refine it. Use the Select and Mask feature. This is in the top menu. It opens a new workspace. Adjust the settings for better edges. Feathering softens the selection. Contrast sharpens it. Shift Edge refines border areas. Adjust these until satisfied.
View selection on different backgrounds. This checks accuracy. Use the Onion Skin or Overlay options. If needed, use the Refine Edge Brush. This tool improves tricky areas. Especially useful for wispy strands. Take time to refine the selection. A good selection leads to better color change.
Creating A New Layer
Begin by creating a new layer in Photoshop to change hair color effortlessly. This step ensures adjustments are non-destructive and reversible, allowing creative freedom.
Creating a new layer in Photoshop is a vital step when you're changing hair color. This approach ensures that your edits don't permanently alter the original image. It’s like having a safety net, allowing you to experiment with colors without fear of ruining your original work.
Adding A Layer For Color Changes
When you're ready to change hair color, adding a new layer is your first action. This layer will hold the color changes you want to apply. In Photoshop, simply click on the 'New Layer' button at the bottom of the Layers panel. This step is crucial because it keeps your edits separate from the original photo. Imagine trying a bold new hair color—wouldn't you want the option to revert if it doesn't turn out as expected?
Ensuring Non-destructive Editing
Non-destructive editing is a lifesaver for anyone working in Photoshop. By using a new layer for your color changes, you ensure that your original image remains untouched. This means you can adjust, tweak, or even completely remove the color without impacting the original photo. Think about the flexibility this offers. You can try different shades, mix colors, or even decide to leave the hair as it is—all without any stress. Have you ever regretted an edit and wished you could go back? With non-destructive editing, you can. Creating a new layer isn't just a technical step; it’s your creative freedom. It gives you the confidence to experiment and learn. So, are you ready to dive into the world of endless hair color possibilities?
Adjusting Hue And Saturation
Changing hair color in Photoshop involves adjusting hue and saturation to achieve the desired shade. Select the hair layer and tweak these settings for vibrant results. Experiment with different hues and saturation levels to find the perfect match.
Adjusting the hue and saturation in Photoshop can transform your hair color with just a few clicks. This powerful tool allows you to tweak the tones, making subtle shifts that can lead to dramatic changes. Whether you're experimenting with a new look or touching up a photo, mastering this skill is both practical and rewarding.
Accessing Hue/saturation Adjustment
To start, open your image in Photoshop. Once your image is loaded, head over to the menu bar and select Image > Adjustments > Hue/Saturation. This will open the Hue/Saturation adjustment panel, providing you the control panel for your color transformation. Alternatively, you can use the shortcut Ctrl + U (Cmd + U on Mac) to quickly access the Hue/Saturation dialog box. This method saves time and is handy for those who frequently adjust colors. With the panel open, you'll see sliders for Hue, Saturation, and Lightness. Get ready to use these tools to change your hair color effectively.
Tweaking The Color Settings
The Hue slider is your primary tool for color changes. Move it left or right to see instant changes in your hair color. A slight shift can turn a natural brown to a vibrant red or a cool blue. Next, adjust the Saturation slider to enhance or reduce the intensity of the color. Increasing saturation will make your hair color vivid and bold, while decreasing it results in a more subdued tone. Finally, experiment with the Lightness slider to adjust the brightness of your selected color. Brighten it for a sun-kissed look or darken it for a more mysterious shade. Have you ever wondered how your hair would look in an unexpected color? With these adjustments, you can explore a spectrum of possibilities without the commitment of actual dye. Why not try a few different hues and see which one suits your style?
Blending And Finessing
Learn how to change hair color in Photoshop with ease. Blending and finessing techniques enhance the final look, ensuring a natural result. Follow these 7 simple steps for seamless color transformation.
Changing hair color in Photoshop can be a game-changer for your photos. But to make it look real, you need to master the art of blending and finessing. This part is crucial to make sure the new color looks natural and seamless. It’s like adding the final touches to a painting—this is where your creativity truly shines. Let’s dive into how you can blend and finesse your way to perfect hair color.
Using The Brush Tool
The Brush Tool is your best friend for this task. Select a soft brush and choose a color that matches your desired hair shade. Adjust the opacity to control how intense the color appears. Take your time to brush over the hair, focusing on the areas where light naturally hits. This helps in making the new color blend naturally with the existing highlights and shadows. Have you ever noticed how subtle changes can make a huge difference?
Smoothing Edges With Blur
After applying the color, you might notice some harsh edges. This is where the Blur Tool comes in handy. Select the Blur Tool and gently smooth out the edges where the new color meets the original hair. This step helps in creating a seamless transition, making the color change look more natural. Remember that time you tried a new hairstyle and it felt off until you adjusted it just right? That’s exactly what smoothing edges does for your Photoshop project. By using these techniques, you'll find that changing hair color in Photoshop is not only doable but also fun. Are you ready to take your editing skills to the next level?
Reviewing And Refining
Reviewing and refining your work ensures the final image looks natural. During this stage, you adjust minor details to perfect the color change. This step enhances the overall appearance of your edited photo. It helps achieve the desired look and feel.
Checking For Consistency
Consistency across the image is crucial. Ensure the hair color remains uniform. Check different areas of the hair for color match. Sometimes, slight variations can occur. Use the eyedropper tool to verify the color. Compare sections to maintain harmony.
Making Final Adjustments
Final adjustments make a significant difference. Tweak brightness and contrast for a balanced look. Sometimes, the color might appear too saturated. Adjust saturation levels to ensure a natural appearance. Small changes can have a big impact.
Look at the shadows and highlights. They affect the hair's overall appearance. Adjust them for a realistic effect. Use the brush tool for precise changes. This ensures the hair blends with the surroundings.
Saving The Edited Image
Finalizing your hair color change in Photoshop involves saving the edited image. Choose "Save As" from the menu, pick your format, and preserve your creative edits for future use.
When you're finished perfecting your hair color change in Photoshop, the last crucial step is saving your edited image. Saving properly ensures that all your hard work isn't lost and that your final image retains its quality. It also allows you to return to the project if you want to make more adjustments later.
Choosing The Correct File Format
Selecting the right file format is essential when saving your edited image. If you plan to share the image online or through social media, save it as a JPEG to balance quality with file size. JPEGs are widely accepted across platforms and ideal for web use. However, if you're looking to keep a high-quality version for printing, consider saving it as a TIFF or a high-resolution PNG. These formats preserve the details and colors of your image better than a JPEG. Remember, the file format you choose can affect the final look of your image.
Preserving The Original
Always keep a backup of your original image. This practice ensures that you can revert to the untouched version if needed. Simply save the original in a safe location before starting your edits. Consider saving your edited version as a PSD file as well. PSD files are Photoshop's native format and keep all your layers intact. This way, if you decide to tweak the hair color later, you can easily do so without starting from scratch. Have you ever edited an image and wished you could go back to the original? Keeping both versions gives you the flexibility to make changes without any stress. This small step can save you a lot of time and frustration in the long run.
Conclusion
Changing hair color in Photoshop is simple and fun. Just follow the seven steps. You can experiment with different shades and styles. This tool offers creativity without any commitment. Practice makes perfect, so keep trying new techniques. Photoshop lets your imagination shine.
Enhance photos and make them unique. Share your creations with friends and family. Enjoy the process and see your skills grow. Anyone can master this with patience and practice. Dive in and start transforming your photos today!
Related blog posts
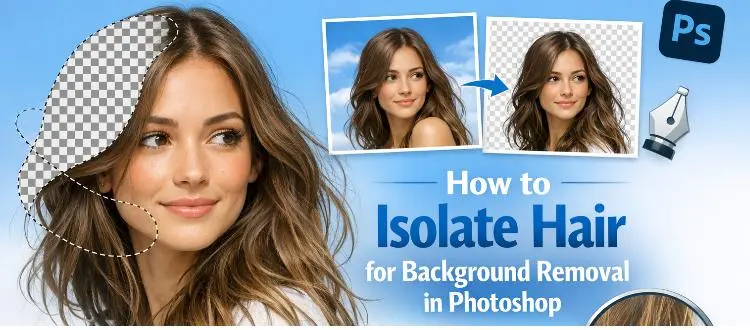
How to Isolate Hair for Background Removal in Photoshop
Are you tired of spending hours trying to perfectly isolate hair from a background in Photoshop, only to end up with messy, unnatural edges? You're not alone.
Clipping Path Associate has empowered businesses globally for over 12 years. A passionate team is dedicated to providing meticulous photo editing services. Expertise is offered in a range of areas, from precise clipping paths to flawless image retouching. The company offers straightforward yet impactful solutions tailored for photographers, e-commerce enterprises, advertising agencies, web design firms, magazine publishers, printing companies, and more.
We Accept : 